Securing the Refinery#
Two modalities are available:
Http basic-auth
Setting up basic auth#
Most of the setup happens with your web frontend, for instance Nginx. You should consult the relevant documentation to set up the basic auth mechanism. This will provide a simple login + password form in front of the application.
Now, if you want to make a data-mesh configuration work in this context, you have to provide the credentials of the target instance in the tshistory.cfg configuration file.
Let’s start with a sample configuration with one external source:
[dburi]
power = postgresql://power

[sources]
power.meteo = https://refinery.meteo.acme.com/api
This describes a power refinery that also consumes meteorogical data from a meteo instance. Now if you just put http basic auth in front of your meteo instance, you have to add a new section like the following:
[auth]
meteo.uri = https://refinery.meteo.acme.com/api
meteo.login = <login>
meteo.password = <password>
Working with OpenID Connect#
Note
The OpenID Connect adapter for the Refinery is an Open Source component, like the rest of the Refinery, but it is provided in the context of Pythonian’s paying plans like e.g. the Premium Subscription.
This enables a very secure and seamless SSO experience for users if well configured. Moreover, it permits to assign roles to the users. Let’s describe them right away, and their associated capabilities:
guest : user is vetted by the OIDC platform but is unknown from the Refinery. Can’t do nor see anything.
ro : with this role, everything can be read, nothing can be created, updated or deleted.
rw : this role allows all CRUD operations except specific things only Admins can do.
admin : this role can do everything.
Now, back to the setup. In the next chapter, we will see how to configure one particular OIDC platform (KeyCloack) for a Refinery instance. And in the subsequent chapter, we will configure the Refinery instance for all the relevant access scenarios.
Indeed, we need these 3 scenarios to be handled:
web access by end users
robot access (or machine to machine) by e.g. scrapers, models, etc.
scripting access for end users
Though the last two ones look similar, their security context is differents:
the robots are hosted on a secure server platform,
the end user runs from an a priori unsecure computer.
Setting up KeyCloak clients#
KeyCloak is a powerful and also complex platform and we don’t cover its use at all. We are only concerned with the configuration of what is commonly used an OIDC client. To properly secure all access modes to a Refinery, we need two such clients and we will show how to configure them. Such configuration steps should be similar with other OIDC platforms.
Confidential client#
The first client is said to be confidential (or private) because its users (except for the web browser) are deemed secure enough to host the necessary credentials (especially the client_secret). It covers the need of:
web access,
robot access.
Let’s configure one for our eFlower application (which is about power prices and marginal co2 forecasts).
In KeyCloak, we create the client as such:
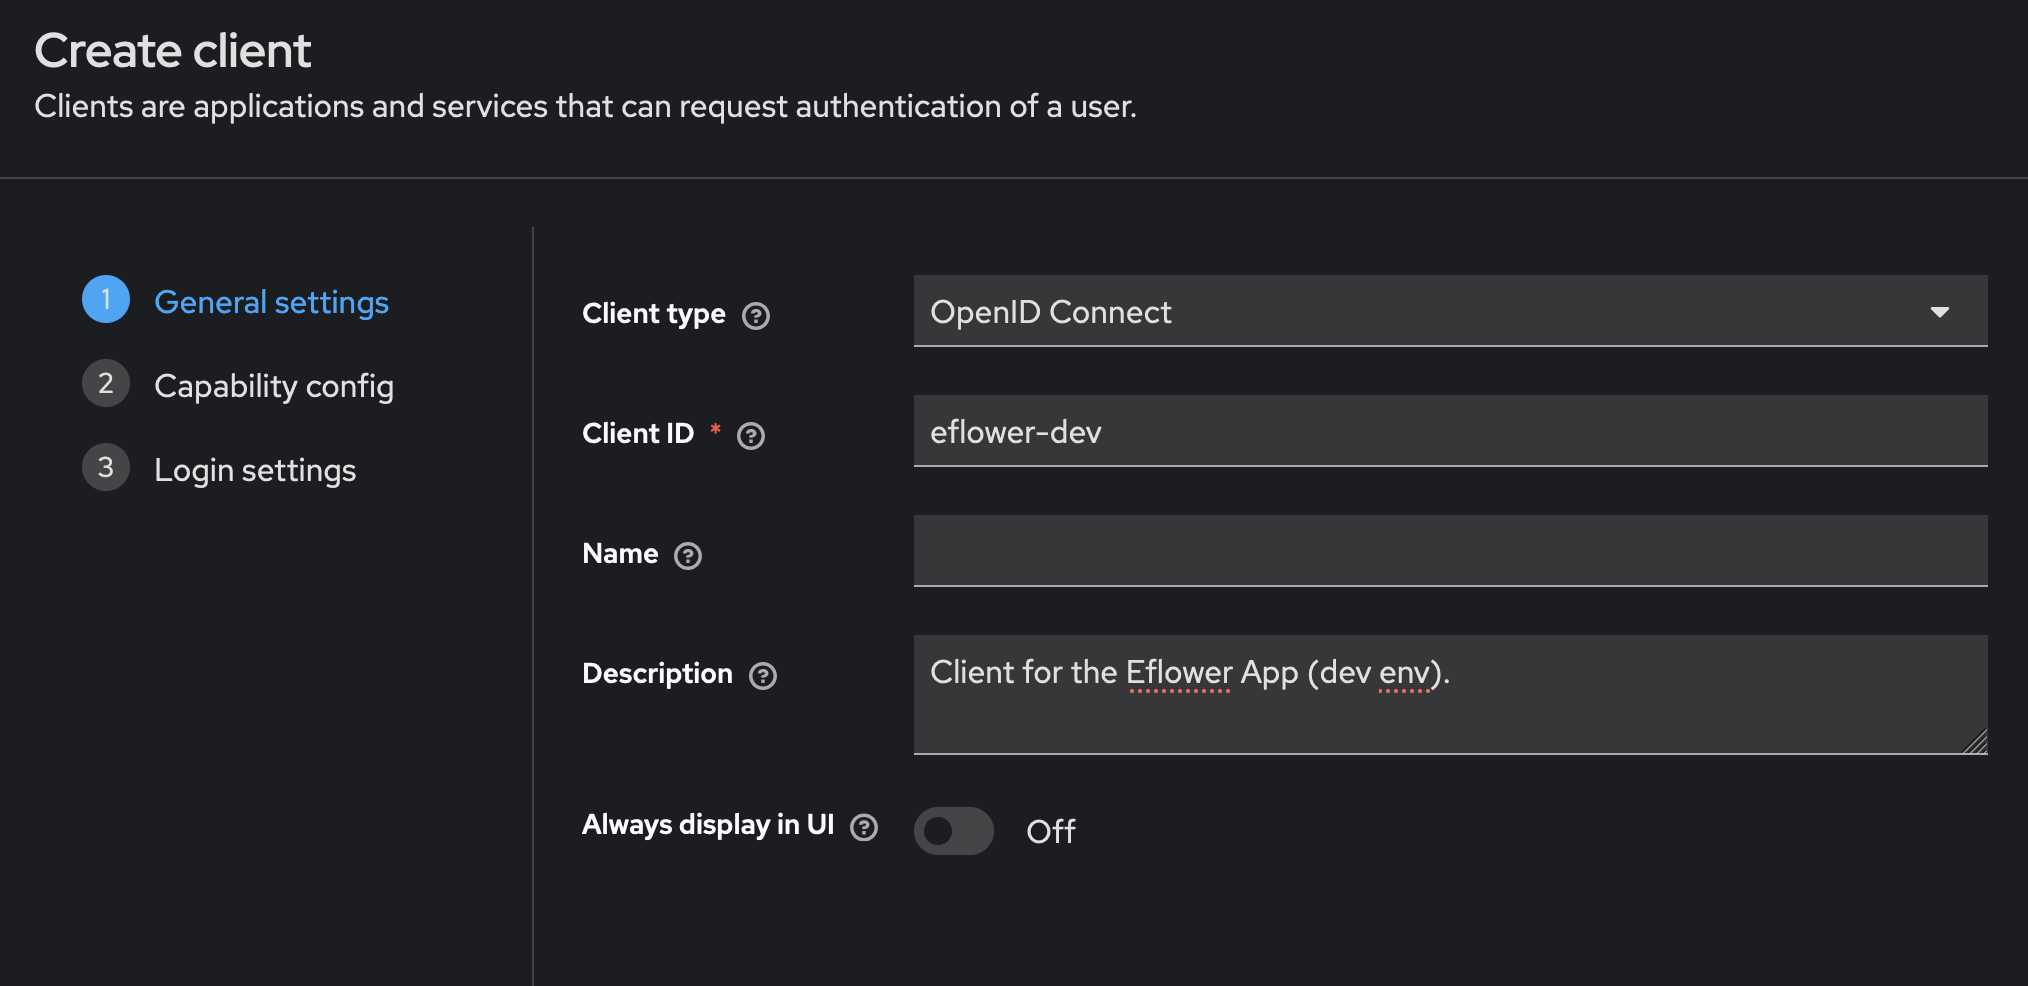
The client_id is the most important piece of information there. Note it for later.
Then, the second part:
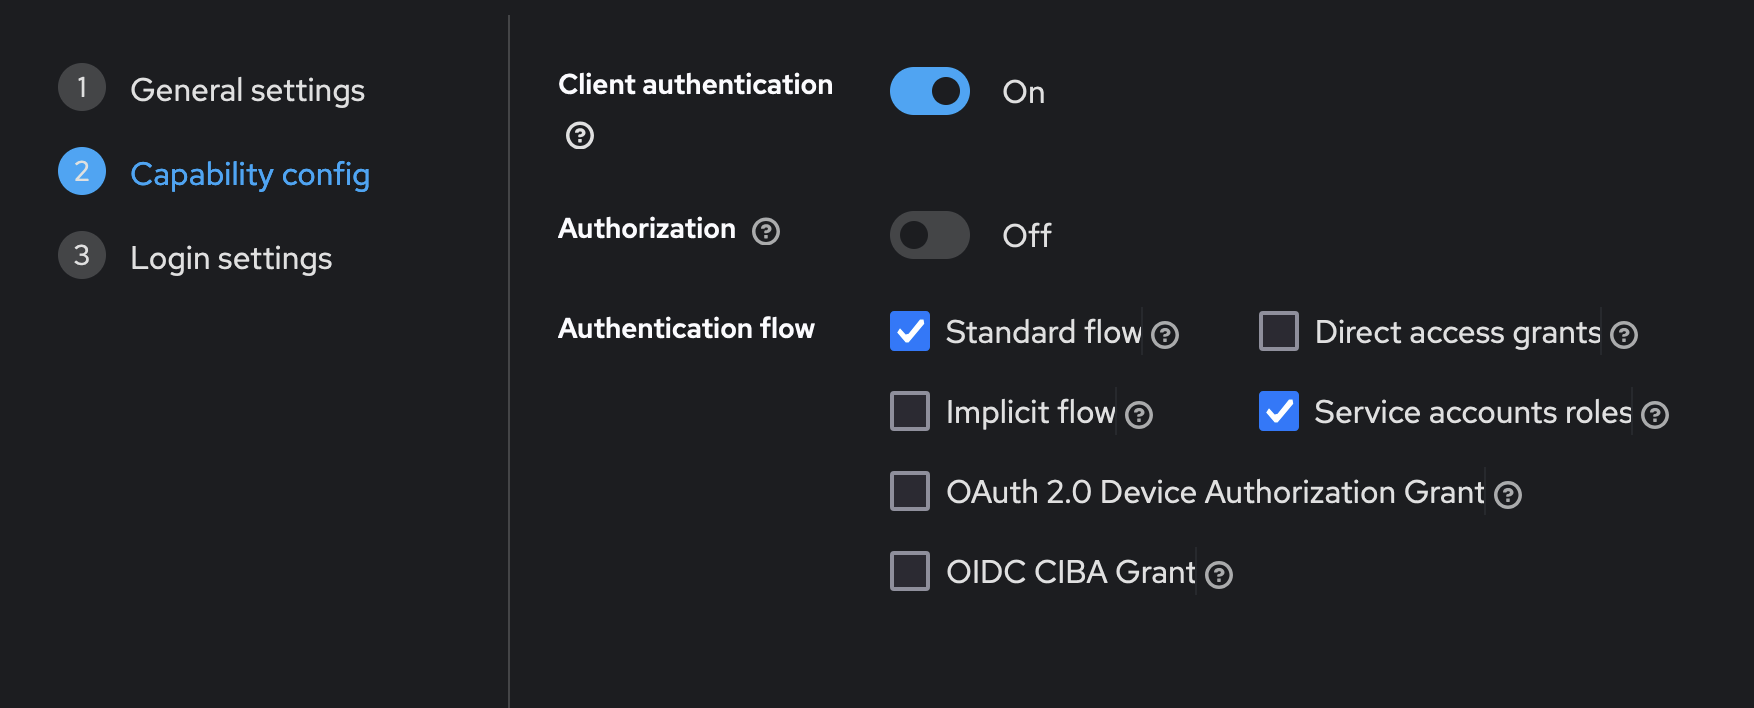
The client authentication flow flag is of utmost importance, since it indicates this is a confidential or confidential client.
Now we have to setup a number of uris:
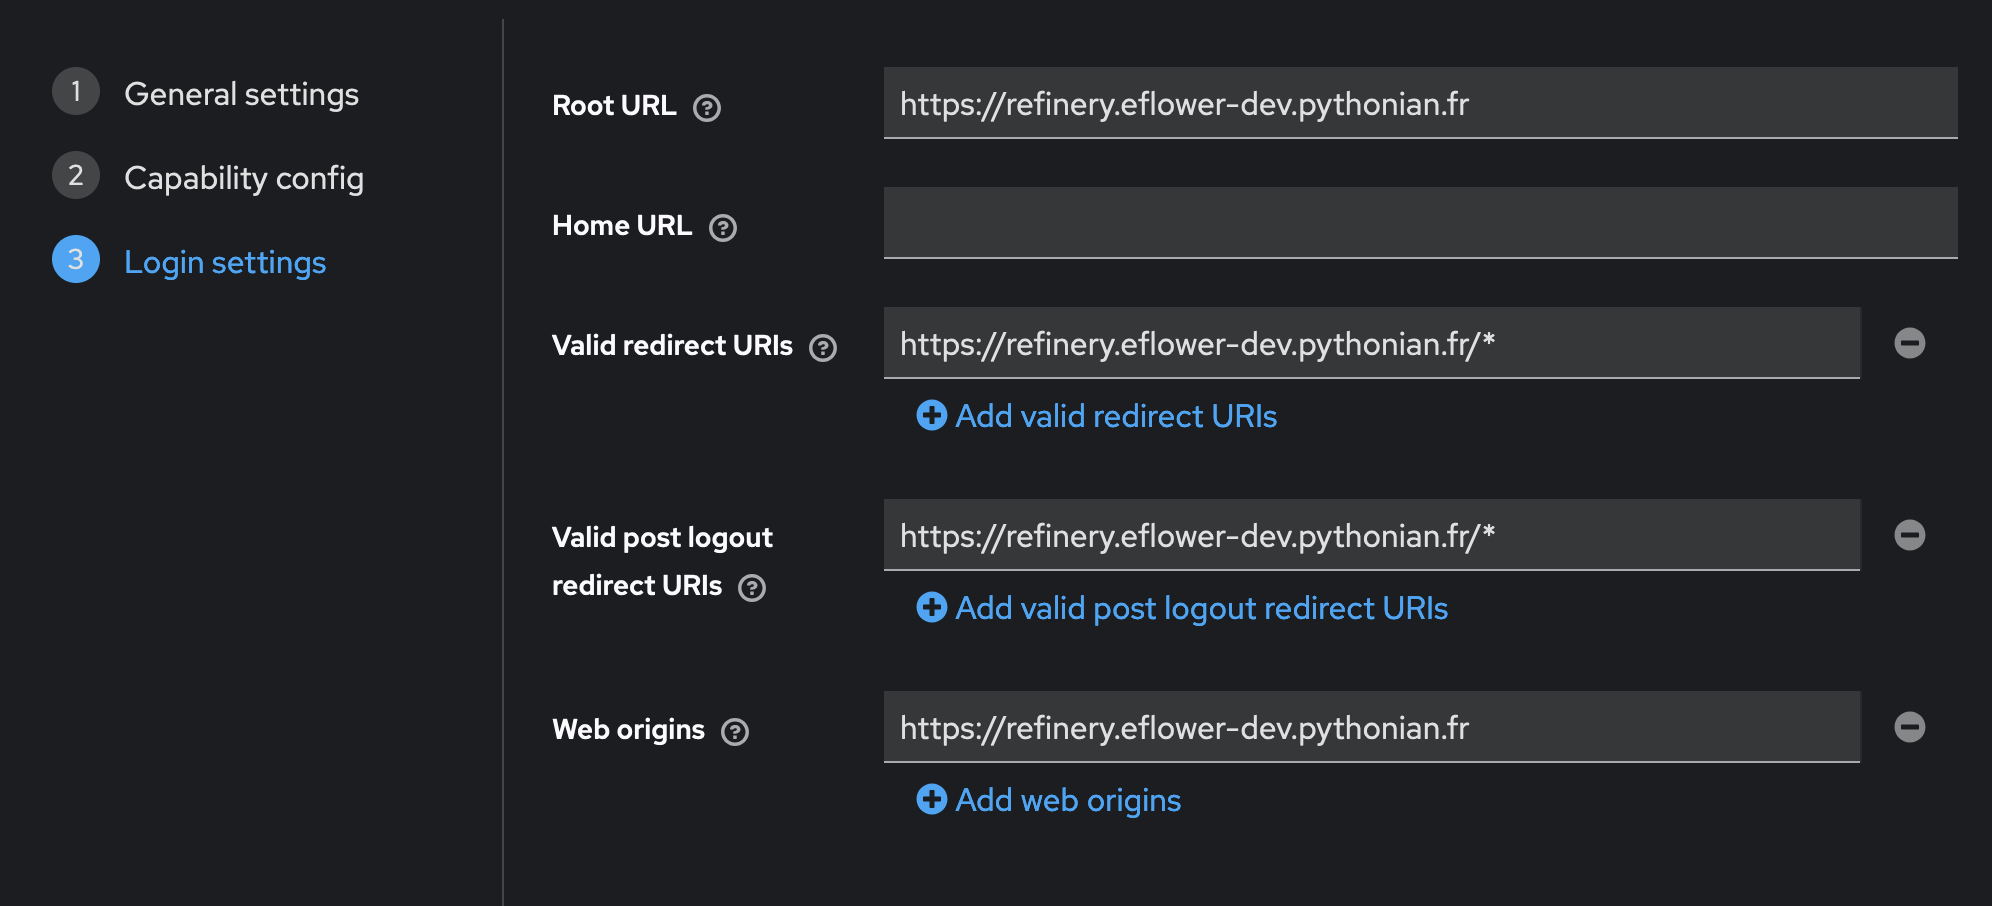
These of course must match the specific uris you have for the eFlower application.
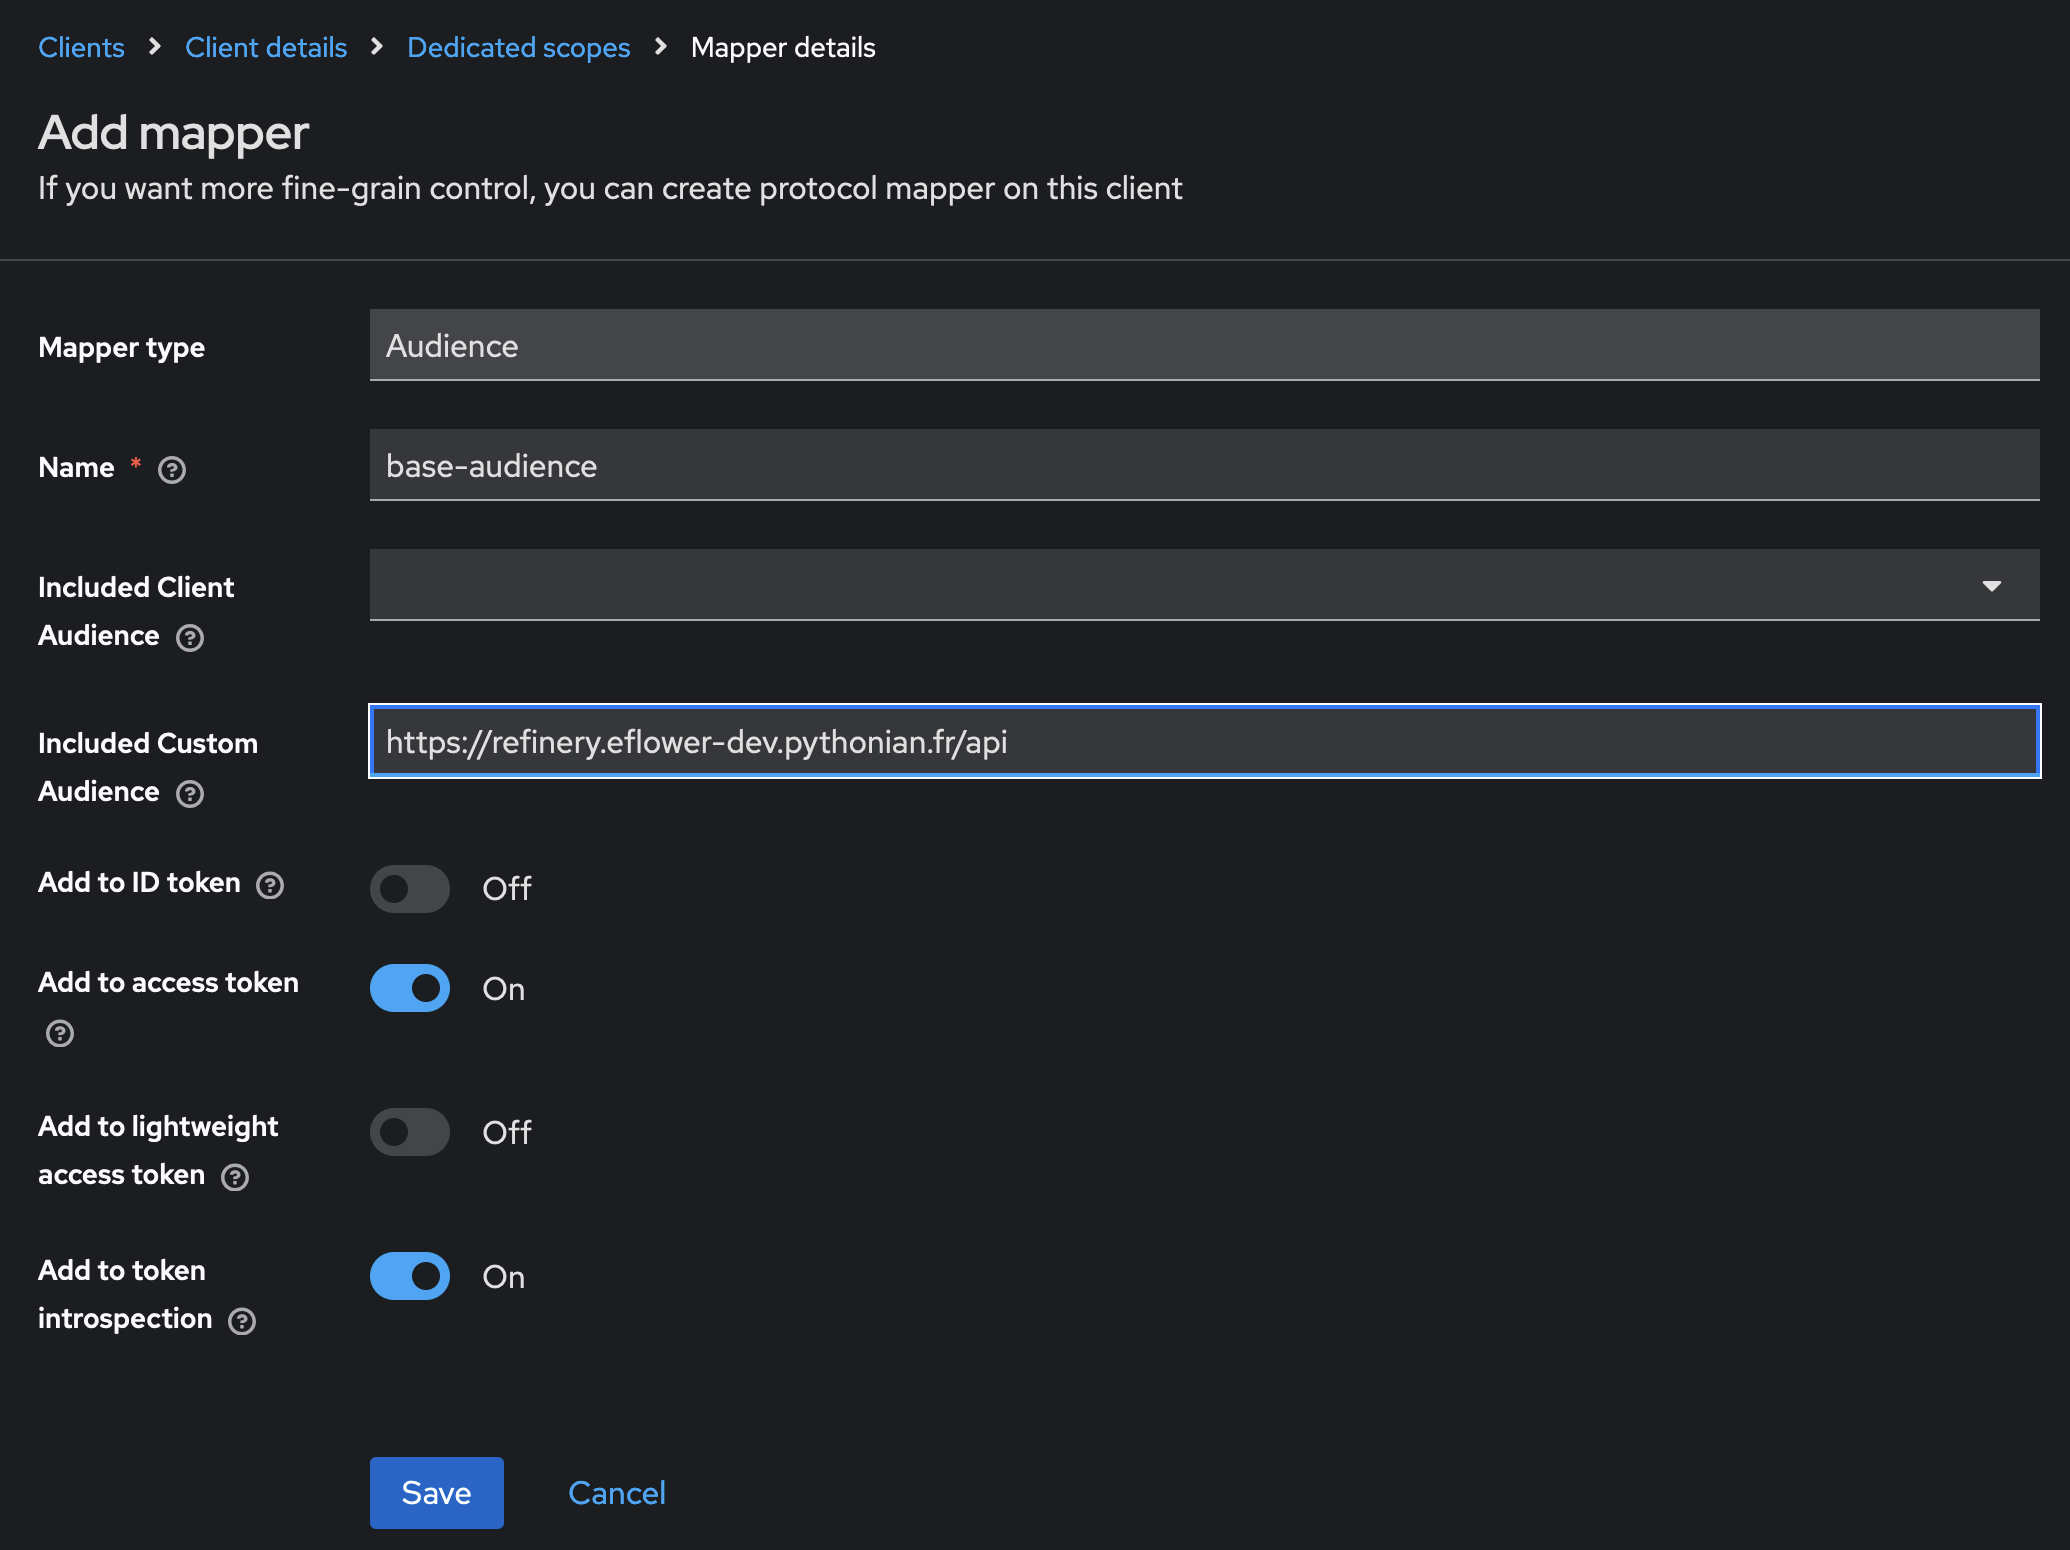
As a last step, we are going to configure an audience for our application. First, go to the Client Scopes tab.
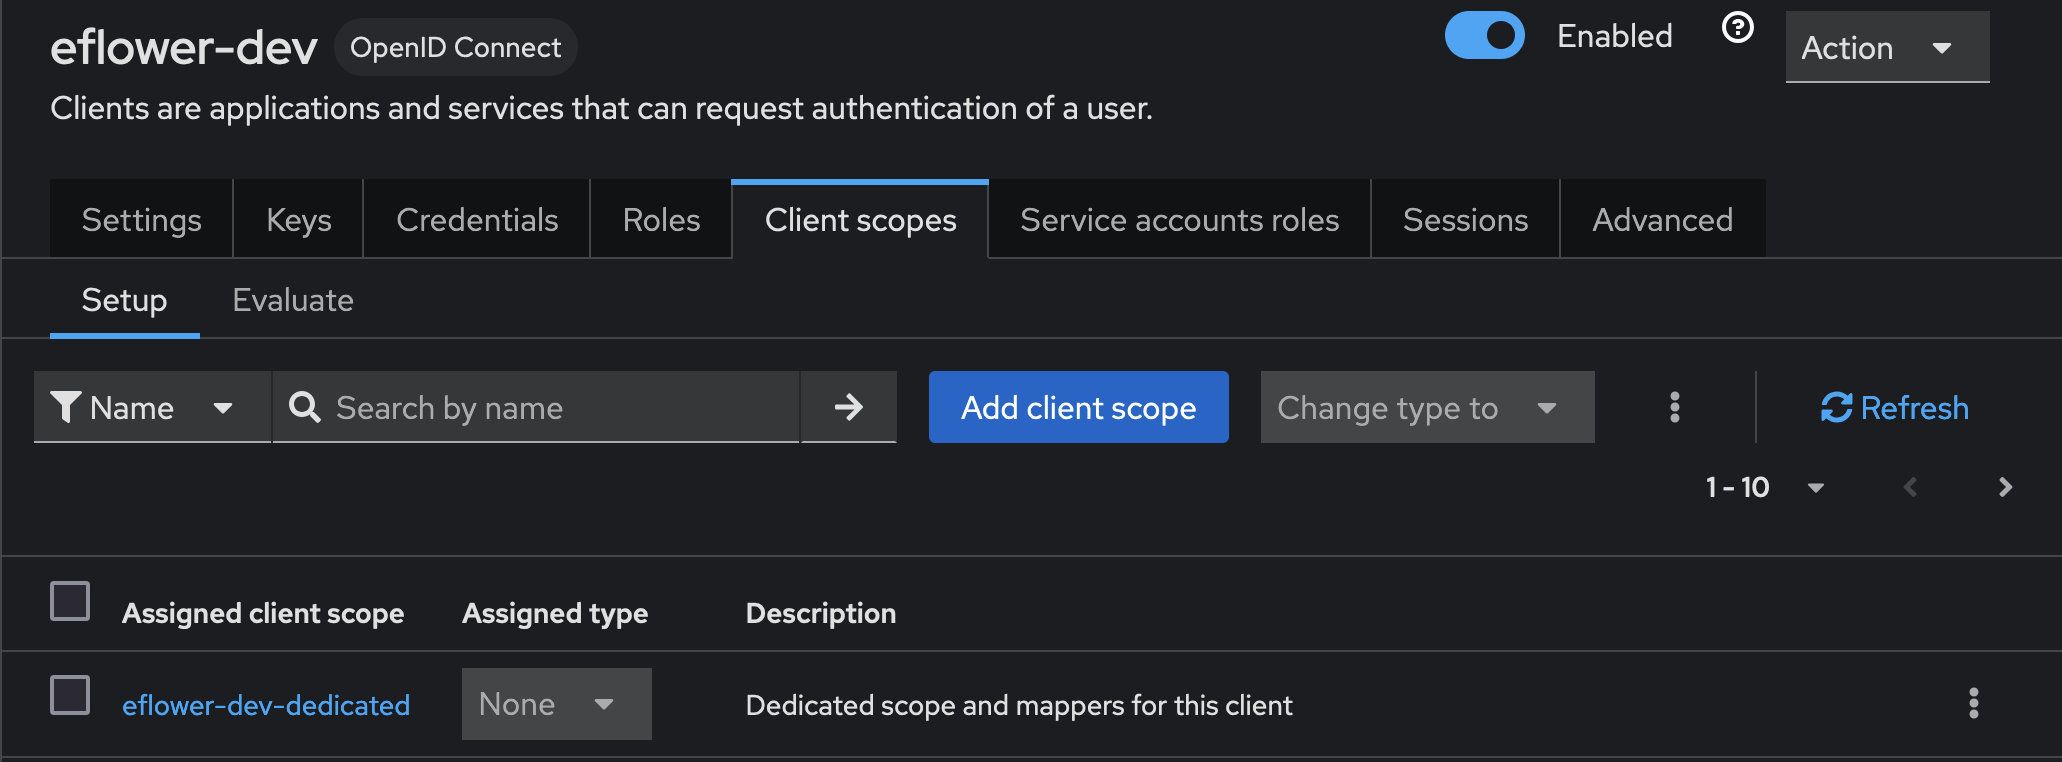
There, you will see a list of scopes including one that has been created automatically for you (at client creation time) named eflower-dev-dedicated. Click on this item. You land in a section to manage mappers and scope for eflower-dev-dedicated. Chose Add a mapper (by configuration), and fill this:
Public client#
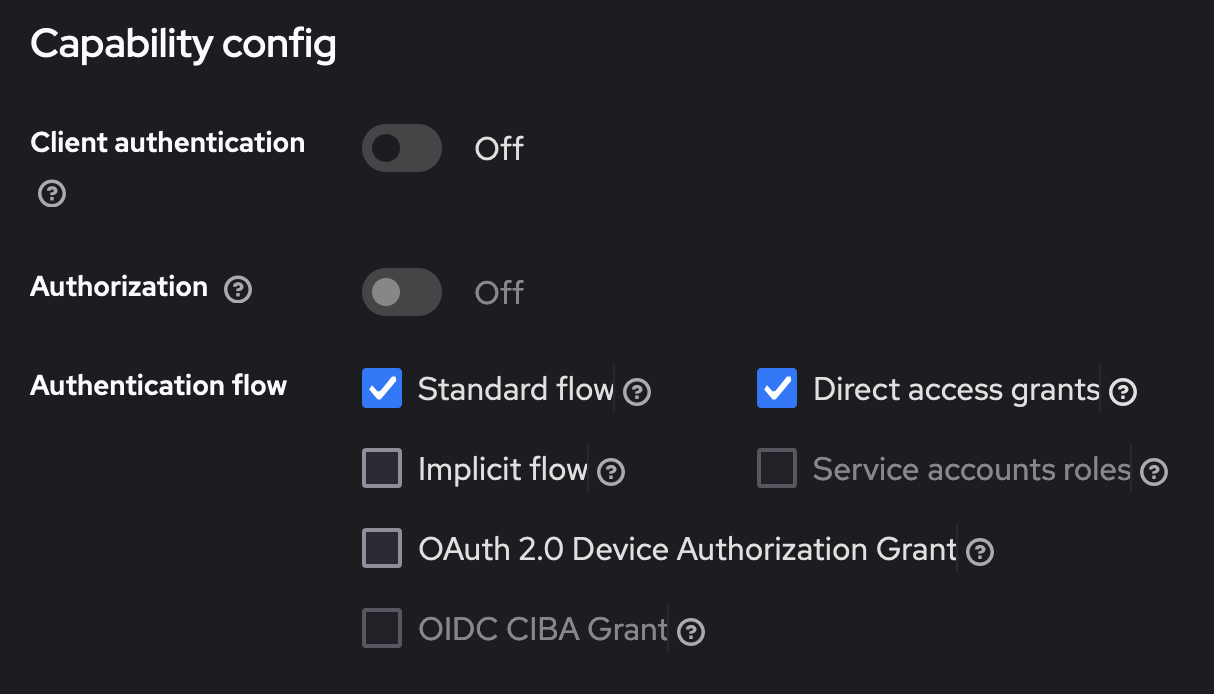
Create a new client with the eflower-dev-public id. The important differences with the confidential client lie in:
an additional Valid redirect URI: http://localhost:5000/*
the client authentication field must be set to off
The audience, like other parameters, must be set up the same way as with the confidential client.
Setting up the Refinery configuration files#
The tshistory.cfg must be augmented in the [auth] sections.
For a machine to machine configuration (typically server side), you want something like this (with the secret set to an appropriate value):
[auth]
eflower_dev.uri = https://refinery.eflower-dev.pythonian.fr/api
eflower_dev.client_id = eflower-dev
eflower_dev.client_secret = <secret>
eflower_dev.domain = id.cloudcrane.tech.scaleway.cloudcrane.io/realms/pythonian
For Python users on their laptops, using a Python shell or Notebook, the pkce option is needed. In this case, the personal computer is considered too insecure to host the client_secret and we also want to identify exactly who is making the calls.
So we don’t have a client_secret entry but a pkce key with no value. Also we must refer to the right client (the public one). Here is how it goes:
[auth]
eflower_dev.uri = https://refinery.eflower-dev.pythonian.fr/api
eflower_dev.pkce =
eflower_dev.client_id = eflower-dev-public
eflower_dev.domain = id.cloudcrane.tech.scaleway.cloudcrane.io/realms/pythonian
Associating roles to users#
Any user that connects to a Refinery instance through OIDC will be default have the guest status. Guests are unknown from the Refinery and can’t see nor do anything at all.
So one needs to assign users to relevant roles: admin, rw or ro. Two command line operations are provided to manage this:
tsh list-users-roles
tsh set-user-role
The first lists the existing user / role mapping. Here’s how it works.
$ tsh list-users-roles
No user is currently known.

$ tsh set-user-role babar@timeseries.fr admin
$ tsh set-user-role celeste@timeseries.fr rw
$ tsh list-users-roles
Found 2 users.

admin → ['babar@timeseries.fr']
rw → ['celeste@timeseries.fr']

$ tsh set-user-role babar@timeseries.fr guest
$ tsh list-users-roles
Found 1 users.

rw → ['celeste@timeseries.fr']
Note
A web ui in the settings section will also be provided in an upcoming release to help perform these operations. The initial admin role will still have to be set up through the command line.