Basics#
General setup reminder#
Setup your machine#
In this chapter, we assume you have setup a Refinery instance on some server.
Let’s install the client on you local machine:
$ pip install tshistory_refinery
And save the config file tshistory.cfg in the home directory,
containing:
[dburi]
refinery = https://refinery.<myrefinery>.pythonian.fr/api
If the instance is behind some security protection, you have to fill the [auth] section.
[auth]
refinery.uri = https://refinery.<myrefinery>.pythonian.fr/api
refinery.login = <username>
refinery.password = <password>
That’s for http basic auth. For a more complicated security setup, see the security chapter.
The naming convention : an essential step#
First and foremost, users of the refinery need to gather and define together the naming convention. This is an important aspect of the data governance.
This convention concerns all the series (primary and formulas) available in the data referential.
Every person of the team needs to know it very well. They will define new data following this convention and find quickly and efficiently the data they need.
Here are some tips:
define the separator of your keywords. Let’s choose a dot for our example “.”
gather all the types of keywords you could need. Let’s assume we work with fruits transactions, here is our list:
type of aliment
type of fruit
country of origin
country of selling
type of transaction (sell/buy)
unit (currency/weight)
farmer
buyer
granularity
choose the most intuitive order of keywords: aliment.fruit.transaction.farmer.buyer.from_country.to_country.unit.granularity
example : fruit.banana.buy.misterfield.superfrenchshop.civ.fr.eur/t.d
Note
Some of these aspects probably belong to the metadata of the series. However a good name goes a long way when it comes to making a data referential easily usable for everyone. So encoding some metadata both in metadata proper and in the title definitely makes sense.
Initialize the timeseries client#
from tshistory.api import timeseries
tsa = timeseries()
How to create / update / read “primary” time series#
Create a series#
import pandas as pd

ts = pd.Series(
    data=[1, 2, 3],
    index=pd.date_range(start="2024-11-01", freq="D", periods=3)
)
seriesname = "fruit.banana.buy.misterfield.superfrenchshop.civ.fr.eur/t.d"

tsa.update(seriesname, ts, author="fruit@lover")
Get your series#
>>> ts = tsa.get(seriesname)
>>> ts
2024-11-01    1.0
2024-11-02    2.0
2024-11-03    3.0
Name: fruit.banana.buy.misterfield.superfrenchshop.civ.fr.eur/t.d, dtype: float64
Update your series#
Overwrite existing values and add one for the 4th of November:
ts = pd.Series(
    data=[5, 6, 7, 10],
    index=pd.date_range(start="2024-11-01", freq="D", periods=4)
)
seriesname = "fruit.banana.buy.misterfield.superfrenchshop.civ.fr.eur/t.d"

tsa.update(seriesname, ts, author="fruit@lover")
Get the new version of the timeseries:
>>> ts = tsa.get(seriesname)
>>> ts
2024-11-01     5.0
2024-11-02     6.0
2024-11-03     7.0
2024-11-04    10.0
Freq: D, Name: fruit.banana.buy.misterfield.superfrenchshop.civ.fr.eur/t.d, dtype: float64
Note
The update is as important as get.
Let’s explain its semantics:
its input series is used to patch the existing series state
existing points with unchanged values will just be dropped
new points will be added
modified points will be updated
points with nan values will erase existing points
if there is no difference between the inserted points and the ones in base, no revision is created
it returns a series of the points that have been either added, update or erased
if the series doesn’t already exist, it is created
How to Exists / Rename / Delete time series#
>>> tsa.exists(seriesname)
True
>>> tsa.rename(seriesname, 'new.name')
>>> tsa.exists(seriesname)
False
>>> tsa.delete('new.name')
>>> tsa.exists('new.name')
False
Going further: playing with revisions#
Now let’s assume that we work with a forecast:
# create a forecast series
insertion_dates = pd.date_range(
    start=pd.Timestamp('2024-11-01T09:00+00:00'),
    end=pd.Timestamp('2024-11-04T09:00+00:00'),
    freq='D'
)
ts = pd.Series(
    [1, 2, 3],
    index = pd.date_range(start='2024-11-01', periods=3, freq='D')
)
for idx, insertion_date in enumerate(insertion_dates):
    tsa.update(
        'my_morning_forecast',
        ts+idx,
        'sensei',
        insertion_date=insertion_date
    )
Let’s use the get operator. It will give us the last version of each timestamp.
>>> tsa.get("my_morning_forecast")
2024-11-01    1.0
2024-11-02    2.0
2024-11-03    2.0
2024-11-04    2.0
2024-11-05    3.0
2024-11-06    4.0
Name: my_morning_forecast, dtype: float64
Now, let’s investigate our forecast versions.
>>> tsa.history("my_morning_forecast")
{
    Timestamp('2024-11-01 09:00:00+0000', tz='UTC'):
        2024-11-01    1.0
        2024-11-02    2.0
        2024-11-03    3.0
        Name: my_morning_forecast, dtype: float64,
    Timestamp('2024-11-02 09:00:00+0000', tz='UTC'):
        2024-11-01    1.0
        2024-11-02    2.0
        2024-11-03    3.0
        2024-11-04    4.0
        Name: my_morning_forecast, dtype: float64,
    Timestamp('2024-11-03 09:00:00+0000', tz='UTC'):
        2024-11-01    1.0
        2024-11-02    2.0
        2024-11-03    2.0
        2024-11-04    3.0
        2024-11-05    4.0
        Name: my_morning_forecast, dtype: float64,
    Timestamp('2024-11-04 09:00:00+0000', tz='UTC'):
        2024-11-01    1.0
        2024-11-02    2.0
        2024-11-03    2.0
        2024-11-04    2.0
        2024-11-05    3.0
        2024-11-06    4.0
        Name: my_morning_forecast, dtype: float64
}
If we want to see only what changed from one version to the next:
>>> tsa.history("my_morning_forecast", diffmode=True)
{
    Timestamp('2024-11-01 09:00:00+0000', tz='UTC'):
        2024-11-01    1.0
        2024-11-02    2.0
        2024-11-03    3.0
        Name: my_morning_forecast, dtype: float64,
    Timestamp('2024-11-02 09:00:00+0000', tz='UTC'):
        2024-11-04    4.0
        Name: my_morning_forecast, dtype: float64,
    Timestamp('2024-11-03 09:00:00+0000', tz='UTC'):
        2024-11-03    2.0
        2024-11-04    3.0
        2024-11-05    4.0
        Name: my_morning_forecast, dtype: float64,
    Timestamp('2024-11-04 09:00:00+0000', tz='UTC'):
        2024-11-04    2.0
        2024-11-05    3.0
        2024-11-06    4.0
        Name: my_morning_forecast, dtype: float64
}
Let’s assume we want the forecast of the 3rd of Nov at 12am, after the morning run:
>>> tsa.get("my_morning_forecast", revision_date=pd.Timestamp("2024-11-03T12:00:00+00:00"))
2024-11-01    1.0
2024-11-02    2.0
2024-11-03    2.0
2024-11-04    3.0
2024-11-05    4.0
Name: my_morning_forecast, dtype: float64
Adding and fetching metadata#
tsa.update_metadata(
    "my_morning_forecast",
    {
        'fruit': 'orange',
        'buyer': 'superfrenchshop',
        'seasonal': 0,
        'calibration': '2024-10-01'
    }
)
>>> tsa.metadata("my_morning_forecast")
{
    'buyer': 'superfrenchshop',
    'fruit': 'orange',
    'seasonal': 0,
    'calibration': '2024-10-01'
}
Note
Metadata is a very important tool to structure the time series referential. We insisted on the naming convention in the beginning and indeed good names should be good keys and embed a number of metadata aspects of the series. But it is not always enough.
Metadata, at the Python API level, will be managed with flat Python dictionaries.
Using formulas : create a formula#
A low code formula system has been implemented into the Refinery to transform your raw data into enriched indicators. Time travel capabilities are enabled in all levels of aggregation.
tsa.register_formula(
    'my_simple_formula',
    '(resample (series "my_morning_forecast") "h" #:method "interpolate" )'
)
With this formula, we resample our daily series “my_morning_forecast” to an hourly series.
To get the result of this formula, you can use the get method:
>>> tsa.get("my_simple_formula")
2024-11-01 00:00:00    1.000000
2024-11-01 01:00:00    1.041667
2024-11-01 02:00:00    1.083333
2024-11-01 03:00:00    1.125000
2024-11-01 04:00:00    1.166667
                        ...
2024-11-05 20:00:00    3.833333
2024-11-05 21:00:00    3.875000
2024-11-05 22:00:00    3.916667
2024-11-05 23:00:00    3.958333
2024-11-06 00:00:00    4.000000
Freq: h, Name: my_simple_formula, Length: 121, dtype: float64
Let’s add other series to create more complex formulas:
ts = pd.Series(
    data=3,
    index=pd.date_range(start="2024-10-31", freq="h", periods=24)
)
seriesname = "my_series_obs"

tsa.update(seriesname, ts, author="fruit@lover")
Now, let’s create a formula with the priority operator.
We can see that a formula can work with primary and/or formulas in a transparent way.
tsa.register_formula(
    'my_combined_formula',
    '(priority (series "my_series_obs") (series "my_simple_formula") )'
)
Note
The priority operator combines its input series as layers. For each timestamp in the union of all series time stamps, the value comes from the first series that provides a value.
>>> tsa.get("my_combined_formula")
2024-10-31 00:00:00    3.000000
2024-10-31 01:00:00    3.000000
2024-10-31 02:00:00    3.000000
2024-10-31 03:00:00    3.000000
2024-10-31 04:00:00    3.000000
                        ...
2024-11-05 20:00:00    3.833333
2024-11-05 21:00:00    3.875000
2024-11-05 22:00:00    3.916667
2024-11-05 23:00:00    3.958333
2024-11-06 00:00:00    4.000000
Name: my_combined_formula, Length: 145, dtype: float64
Note
See a more detailed description of the formula system in the following chapter : Formulas (computed series)
Similarities and differences with primary series#
You can easily determine if a series is a primary or a formula by using the type method :
>>> tsa.type("my_simple_formula")
'formula'
>>> tsa.type("my_series_obs")
'primary'
Another way to identify the type of a series is to look at the internal metadata :
>>> tsa.internal_metadata("my_simple_formula")
{
    'formula': '(resample (series "my_morning_forecast") "h" #:method "interpolate")',
    'tzaware': False,
    'index_type': 'datetime64[ns]',
    'value_type': 'float64',
    'contenthash': 'fd1ca7df8b9a543c4a232ac9125e89ab0cef493a',
    'index_dtype': '<M8[ns]',
    'value_dtype': '<f8'
}
>>> tsa.internal_metadata("my_series_obs")
{
    'tzaware': False,
    'tablename': 'my_series_obs',
    'index_type': 'datetime64[ns]',
    'value_type': 'float64',
    'index_dtype': '<M8[ns]',
    'value_dtype': '<f8',
    'supervision_status': 'unsupervised'
}
The major difference between primaries and formulas is the impossibility to call the update method on formulas.
Indeed, it is not possible to overwrite a formula value manually.
The other API methods are working on a transparent way :
get
history
metadata
rename
delete
exists
source
Note
You will find a complete description of these methods in the API documentation.
Using the formula editor#
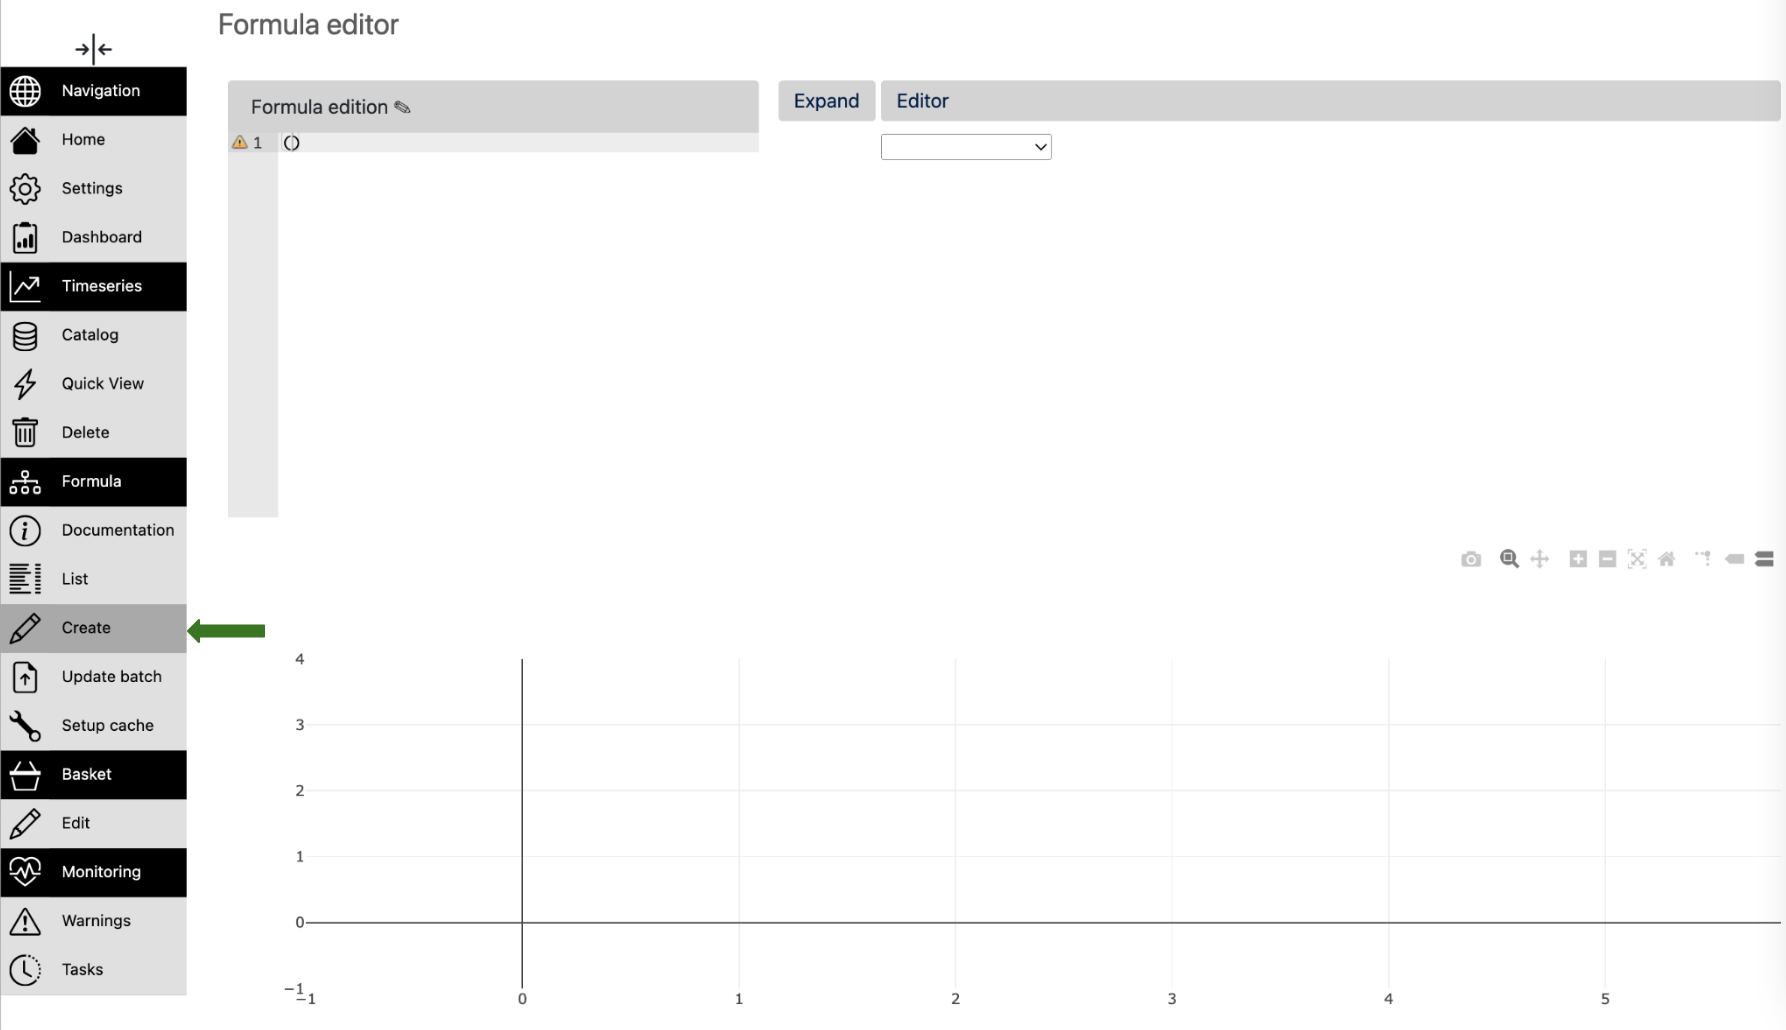
The formula editor is accessible from the menu, section Formulas, item Create:

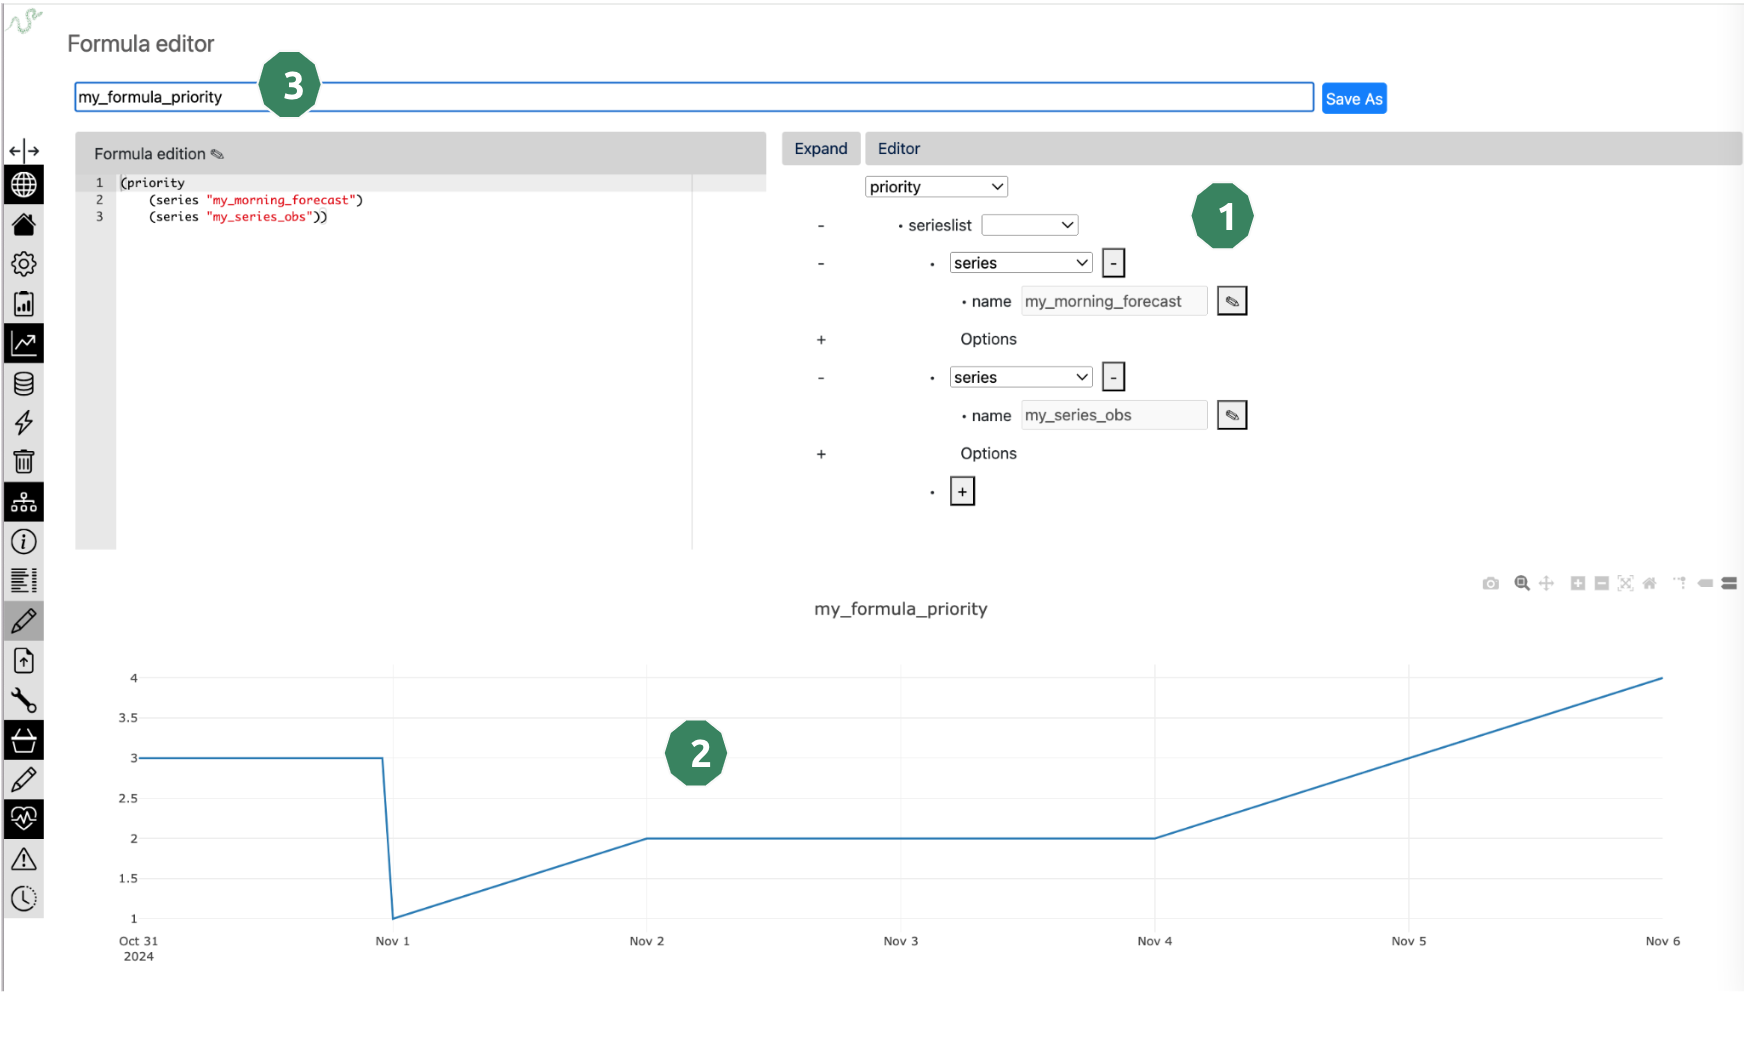
- From this page, you can create a new formula:
by using the dropdowns on the right side of the page
by writing directly the formula on the left side

- The steps are :
Formula creation with the tree
Plot verification of formula output
Enter the name of the resulting formula and click on Save
Seeing all the formulas#
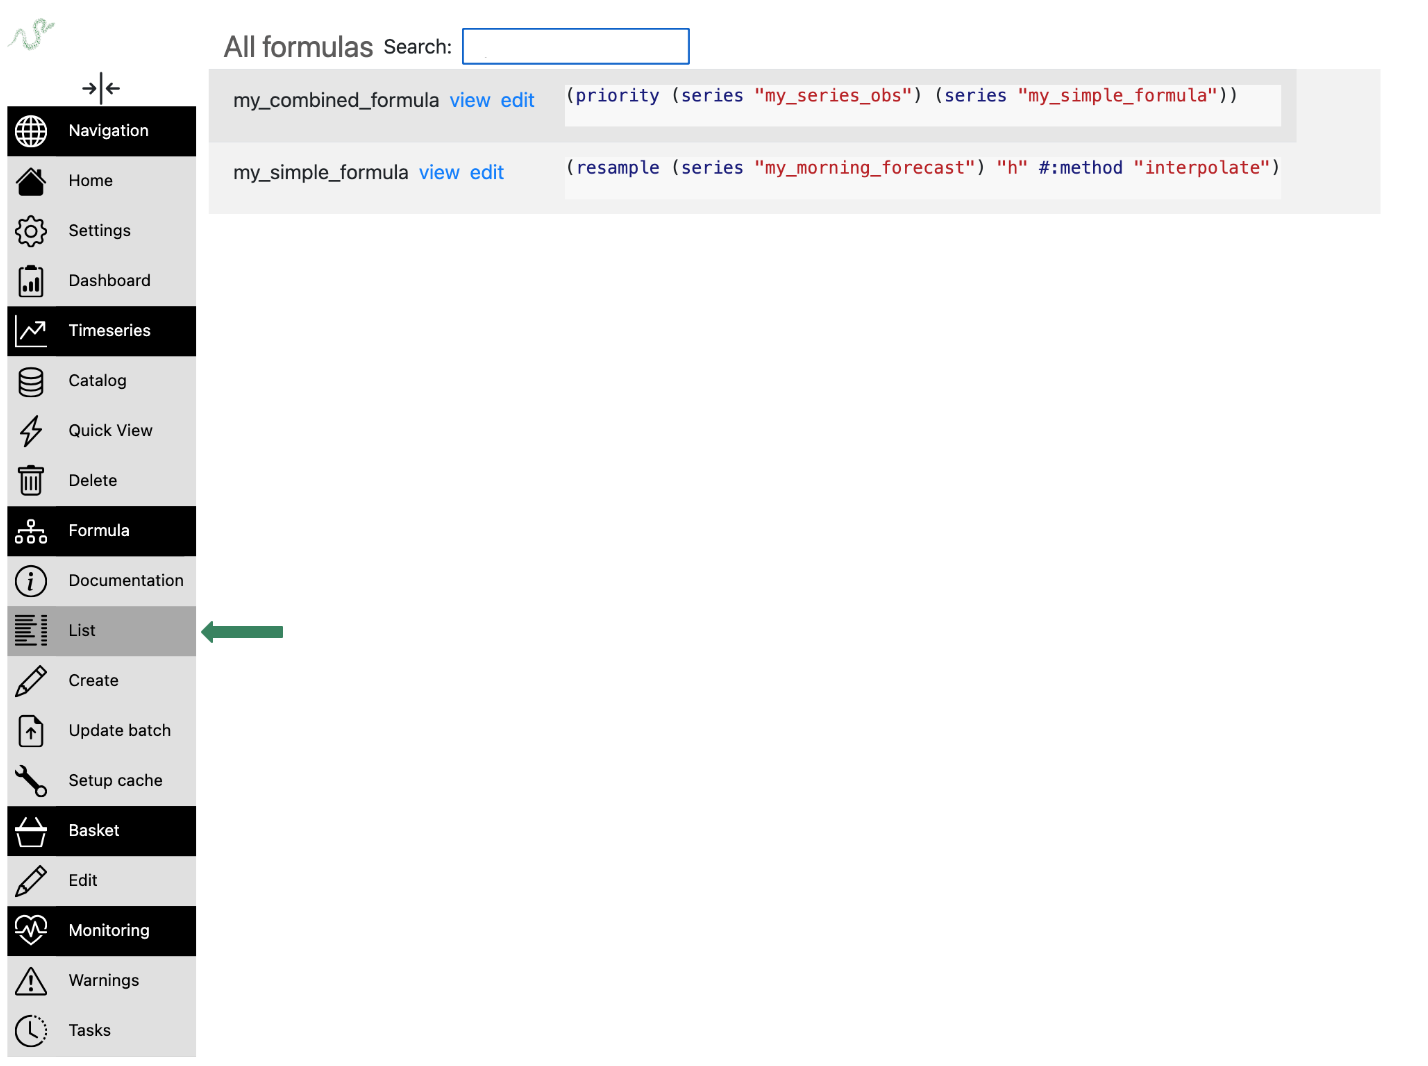
The list of all formulas is available from the menu, section Formula, item List:

Note
- You can filter formulas with the search bar :
on formula name
on formula content